Follow each step carefully. Ensure the circuit breaker is switched off before beginning any wiring work.
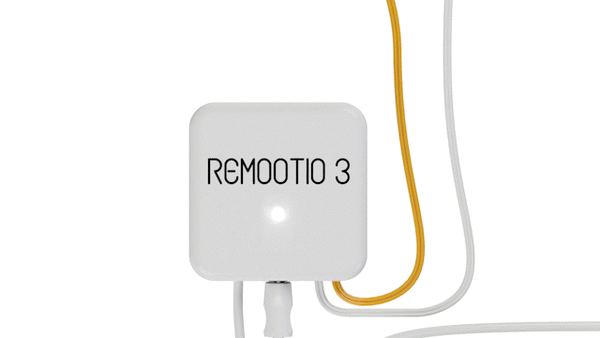
Open the box and remove the Remootio device. The wires, double-sided adhesives and the sensor can be found under the removable paper insert.
What's included:
A — 1x Remootio 3 unit, B — 1x Sensor (wired part, 4m cable), C — 1x Sensor (wireless part), D — 2x Double-sided adhesives for sensor, E — 1x Double-sided adhesive for Remootio unit, F — 1x Power cord (USB A to barrel jack, 1m), G — 1x Control wire (1m), H — 1x Installation manual, K — 1x USB charger (type G / UK plug).
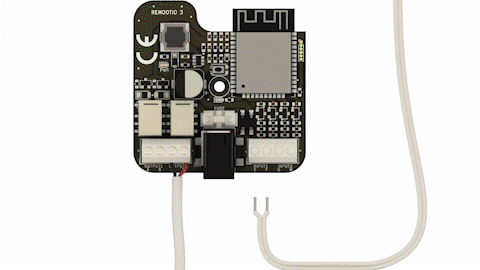
Use a cross-head screwdriver to remove the screw from the Remootio unit and remove the plastic cover to expose the circuit board and terminals.
Caution: Before beginning wiring, ensure you have read this guide carefully and entirely, and that the circuit breaker of your gate or garage door is switched off with no power in the system.
Connect Remootio's control output to the appropriate input terminals of your gate or garage door opener. There are two types of configuration depending on your system:
Single input type
Use the included pair of wires to connect Remootio's control output to your opener's input terminal. One lead connects to the "0V", "GND" or "COM" terminal and the other to "CYC", "IMPULSE", "IMP", "PB", "PP", "START", "SW", "TRG", "WALL BUTTON" or similar, depending on your manufacturer's naming convention.
The outputs are polarity independent — within the same output terminal, the order of the wires does not matter.
Dual input type (separate open and close)
Connect Remootio's output #1 to the "open" input terminal and output #2 to the "close" input terminal. In the Remootio app, go to Settings > Output Configuration and select "Output 1: output to open | Output 2: output to close".
The outputs are polarity independent within the same output terminal.
Use the compatibility checker to find the correct wiring diagram for your specific make and model. If your opener is not listed, contact us for a custom wiring diagram.
Connect the sensor to terminal 4 of the Remootio 3 unit. Use the included adhesives to mount the wireless part of the sensor on the moving part of the gate or garage door, positioned so that it is no more than 30mm from the wired part when the gate or door is closed.
When enabling the sensor interface in the app, make sure to select the corresponding input (in this case "input 1").
You can connect a manual control button or a doorbell button to terminal 5 of the Remootio board. The inputs are polarity independent — the order of the wires within the same terminal does not matter.
Use a screwdriver to reassemble the Remootio unit. Make sure that you do not damage the wires during reassembly. Apply the double-sided tape to the back of the unit for mounting.
Caution: Before connecting power, make sure the circuit breaker of your gate or garage door is switched off and there is no power in the system.
There are four ways to power your Remootio 3 unit:
Option A — Included USB charger
Connect the included USB power cord to the Remootio unit and plug the USB charger into a nearby mains socket.
Option B — From the gate control board
Remootio 3 has a wide operating voltage range (5-32V DC / 12-24V AC), so you can use the dedicated power terminals on your gate control board to power the unit directly.
Option C — Solar / battery powered
Connect Remootio's power cord to the battery of a solar-powered gate system, provided the voltage is within the 5-32V DC range. Most solar gate batteries are 12V. At 12V, Remootio draws approximately 30mA in normal mode and 15mA in low power mode. A typical 7,000mAh gate battery will run Remootio for weeks even without recharging.
Option D — External mains adapter (APV 8-5)
If there is no mains socket nearby and no suitable output on the control board, an external 110V/230V to 5V power adapter can be used. Connect the blue (neutral) and brown (line) wires to the corresponding mains terminals, leaving all previously connected wires in place.
Warning: Do not install the external mains power adapter unless you are a qualified professional or fully knowledgeable about mains electrical wiring.
The Remootio app is available on the Apple App Store and Google Play Store. If you already have the app installed, ensure it is updated to the latest version before adding or updating a device.
When Remootio is not yet set up, the LED will blink approximately twice per second. After Wi-Fi is configured, the LED will be illuminated continuously.
Launch the Remootio app and make sure your smartphone's Bluetooth is enabled. Tap "Set up new device" and wait until the app finds the Remootio unit and completes the setup process.
After successful setup, the LED will blink once every 5 seconds. Your Remootio 3 is now ready to use.
Terminal reference for the Remootio 3 circuit board:
1. Control output 1 (normally open relay)
2. Control output 2 (normally open relay)
3. Power input (5-32V DC, min. 100mA)
4. Add-on input 1 (e.g. sensor input)
5. Add-on input 2 (e.g. doorbell button input)
6. Reset button
7. Fuse
8. Feedback LED
9. Power OK LED