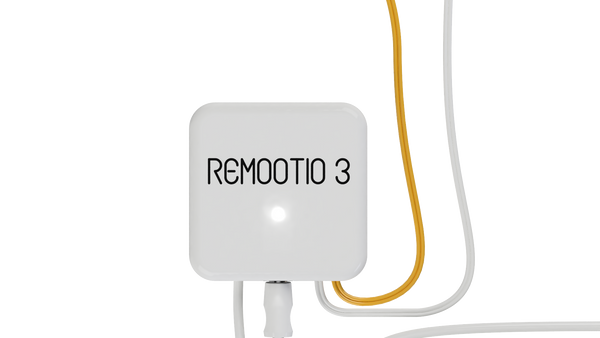
Remootio 3 Installation Manual
Remootio 3 user manual
Introduction
This is a user manual for Remootio 3. If you have a Remootio 2 or Remootio 1 unit, please do not follow the steps of this manual. You can find the corresponding manuals here:
Remootio 2 contact us
Remootio 1 - please contact us (info@charged.services)
Read before use - If you have not purchased a Remootio yet. Buy Remootio 3 Here
This document contains important technical and safety information about the device, its safe use and installation.
CAUTION! Before beginning the installation, please read this guide carefully and entirely and any other documents accompanying the device and any other documents and/or webpages this document refers to. Failure to follow the installation procedures could lead to malfunction, danger to your health and life, violation of law or refusal of legal and/or commercial guarantee (if any). Remootio (Assemblabs Ltd) is not responsible for any loss or damage in case of incorrect installation or improper operation of this device due to failure of following the user and safety instructions in this guide.
Video installation guide
Before you start installation. Check that remootio is compatible by using the Remootio Compatibility checker here
Step 0 - Unboxing
Open the box and remove the Remootio device. The wires, double-sided adhesives and the sensor can be found under the removable paper insert.
Read the instruction manual carefully and follow the instructions
The printed instruction manual can be found on the back side of the paper insert.
Before you begin, make sure that you have read this user guide carefully and entirely and that the circuit breaker of the gate or garage door is switched off and there is no power in the system.
Step 1 - Remove the plastic cover
Use a cross head screwdriver to remove the screw from the Remootio unit and remove the plastic cover.
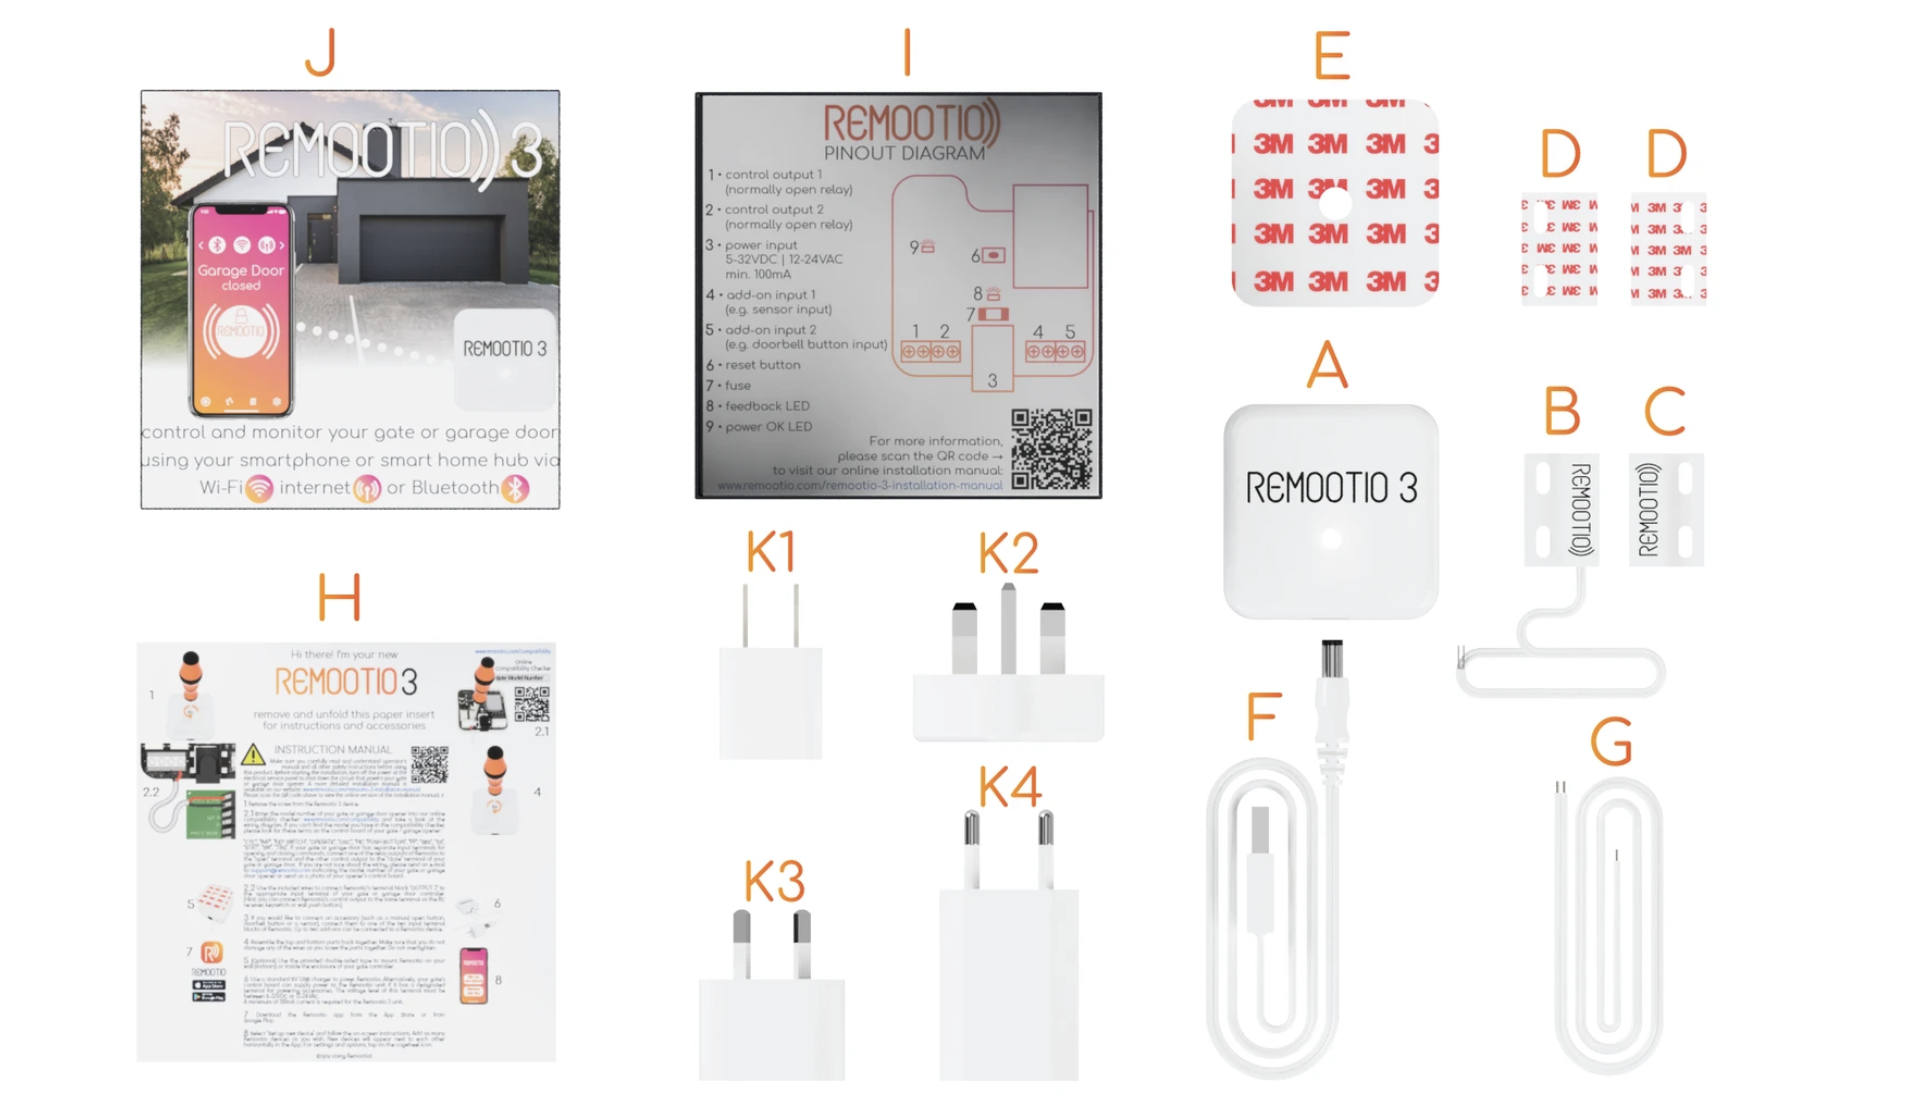
A - 1 x REMOOTIO 3 unit
B - 1 x Sensor (wired part | 4m / 13.12Ft)
C - 1 x Sensor (wireless part)
D - 2 x Double-sided adhesives for mounting the sensor
E - 1 x Double-sided adhesives for mounting the Remootio unit
F - 1 x Power cord (USB A to barrel jack | 1 m / 3.28 feet)
G - 1 x Control wire (1 m / 3.28 feet)
H - 1 x Installation manual
I - 1 x Bottom part of packaging
J - 1 x Top part of packaging
K - 1 x USB charger (depending on where you order from, the product is shipped with type A (US), type C (EU), type G (UK) or type I (AUS) charger.
Read the instruction manual carefully and follow the instructions
The printed instruction manual can be found on the back side of the paper insert.
Step 2 - Wiring the control output
Connect the control output of the Remootio unit to the appropriate input terminals of your gate or garage door. In some cases there is only one input pair (single input) and in other cases there are two input pairs (dual input) on the control board that has to be triggered to open or close the gate or garage door.
Based on the type of required control input, there are two types of gates and garage doors:
A single signal (impulse) can open, stop and close the gate or garage door
Two separate signals (impulses) needed:
One signal for opening
and another signal for closing.
To get an upto date wiring diagram consult our website compatibility checker:
--------------------------------------------------
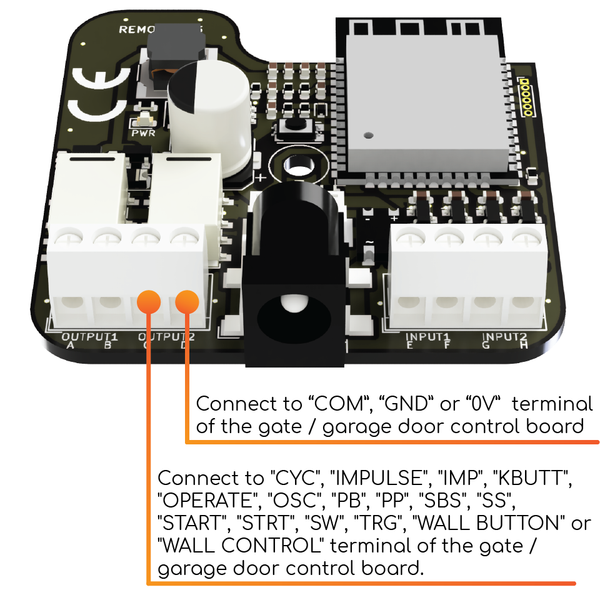
Single input type:
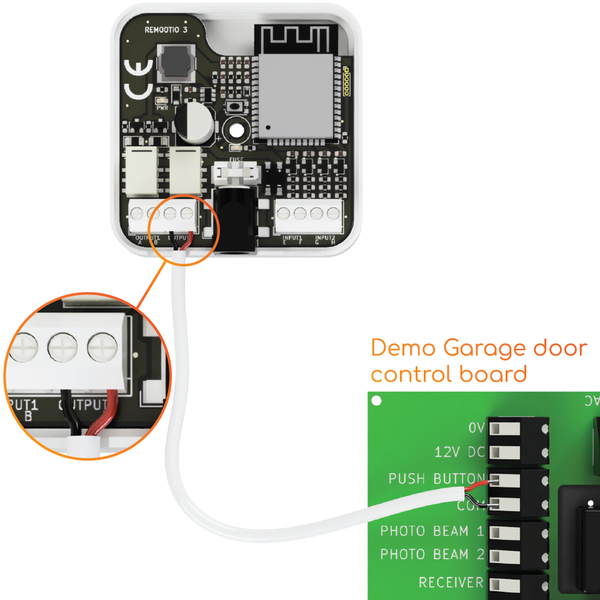
Use the included pair of wires to connect Remootio's control output to the appropriate input terminal of your garage door / gate control board. One of the leads need to be wired to the "0V", "GND" or "COM" terminal and the other lead to "CYC", "IMPULSE", "IMP", "KBUTT", "OPERATE", "OSC", "PB", "PP", "SBS", "SS", "START", "STRT", "SW", "TRG", "WALL BUTTON" or "WALL CONTROL" depending on the manufacturer's naming convention.
(The outputs are polarity independent, which means that within the same output terminal, the order of the wires does not matter).
Please visit and enter the make and model of your gate or garage door to search for the correct wiring diagram.
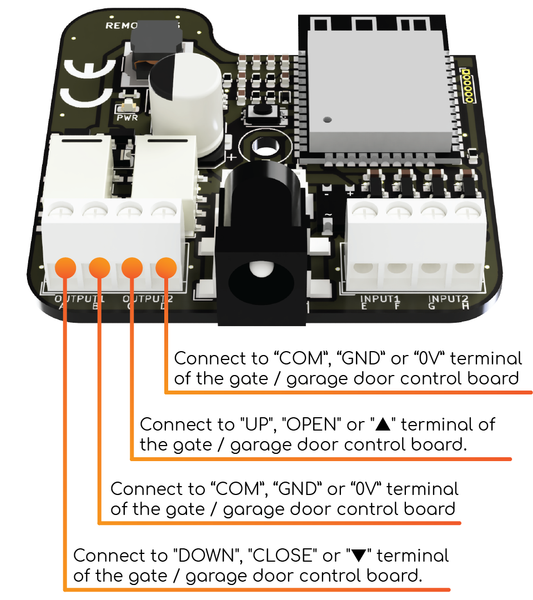
Dual input type (separate input for opening and closing):
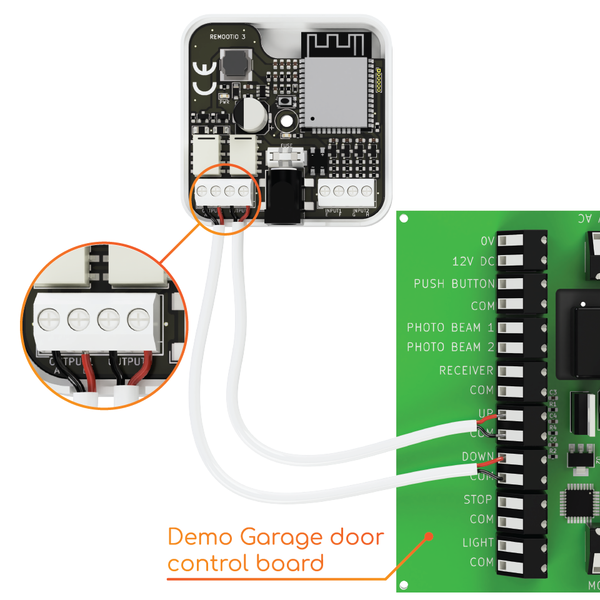
Connect Remootio's output #1 to the "open" input terminal of your gate or garage door control unit and connect Remootio's output #2 to the "close" input terminal of your gate or garage door control unit. If you have a gate or garage door opener that needs both outputs to be wired to the control board, please go to the settings menu of Remootio and select "output configuration" and please choose the "Output 1: output to open | Output 2: output to close" option.
For more details about the output configuration, please visit this article.
(The outputs are polarity independent, which means that within the same output terminal, the order of the wires does not matter).
Step 3 - Sensor installation
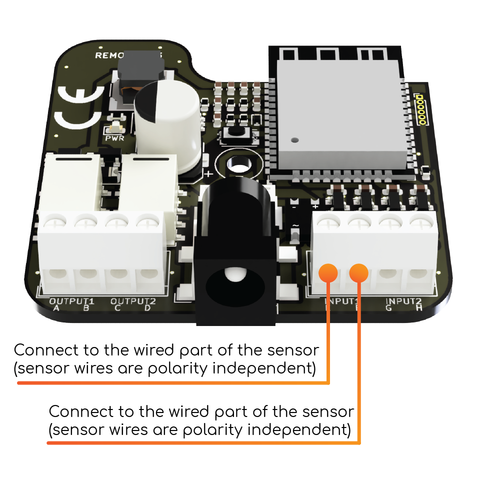
Connect the sensor to terminal 4 of the Remootio 3 unit and use the included adhesives to mount the wireless part of the sensor on the moving part of the gate or garage door in such a way that it is not further than 30mm from the wired part of the sensor when the gate or garage door is closed.
Step 4 - Connecting an accessory
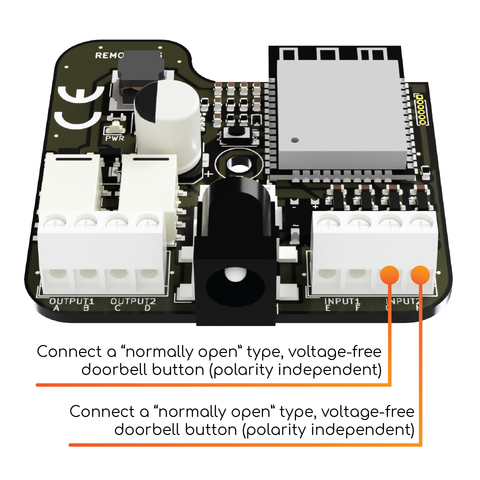
You can connect a manual control button or a doorbell button to terminal 5 of the Remootio board. (The inputs are polarity independent, which means that within the same input terminal, the order of the wires does not matter).
Step 6 - Powering Remootio
Before you begin, make sure that the circuit breaker of your gate or garage door is switched off and there is no power in the system.
There are four ways you can power your Remootio 3 unit:
Use the included USB charger to power the Remootio 3 device
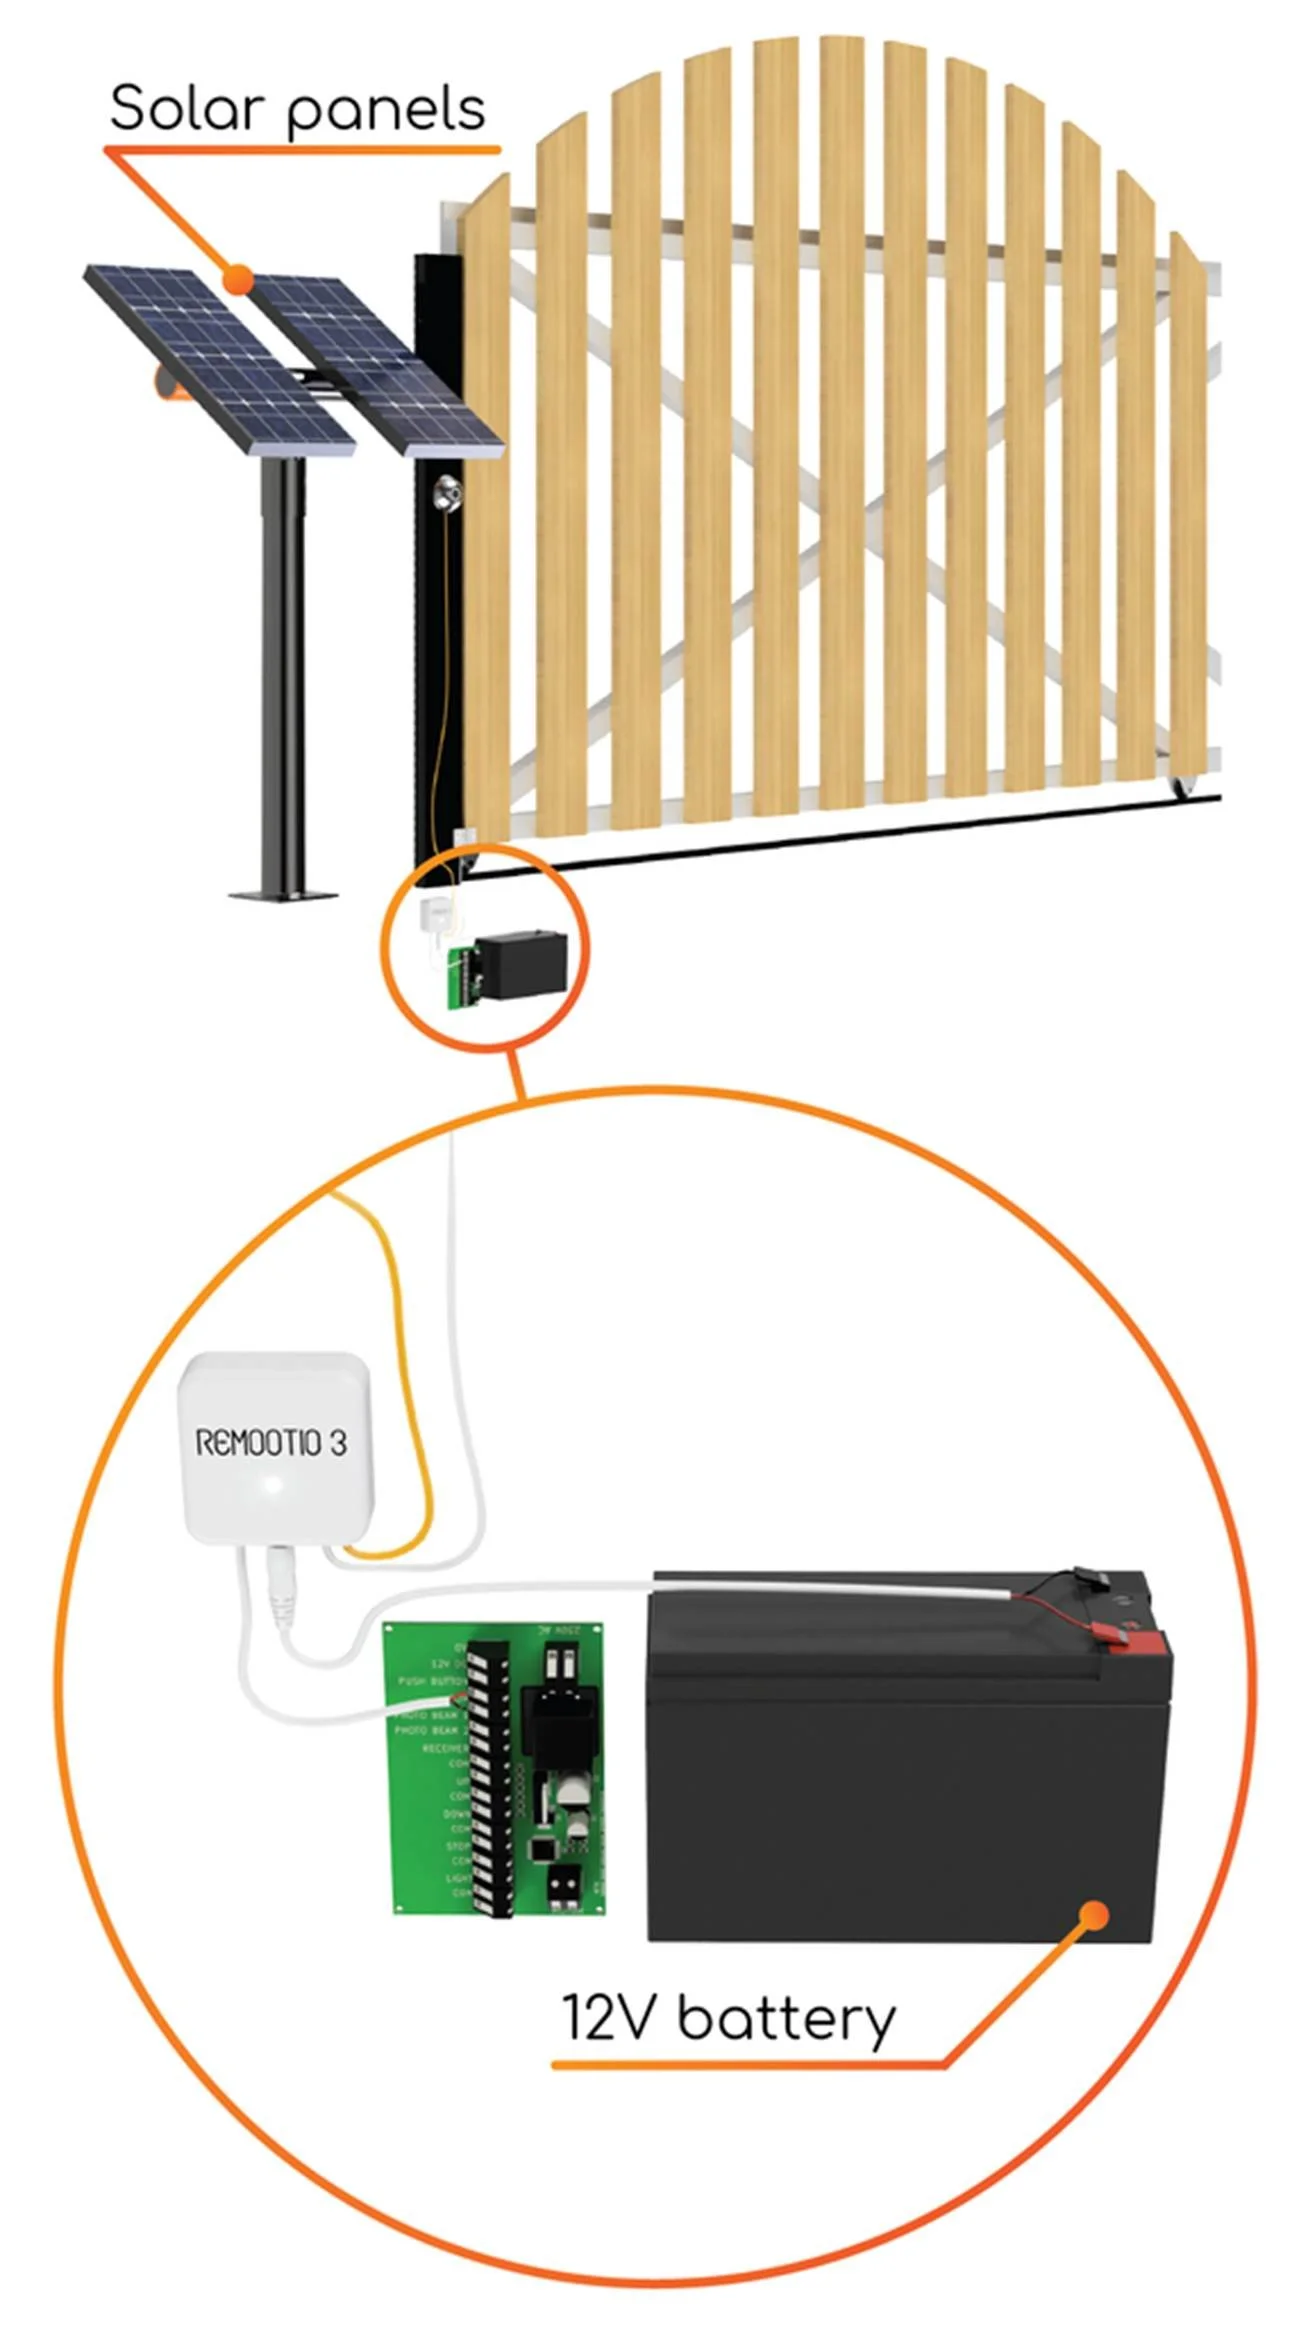
Solar / battery powered operation
You can connect Remootio's power cord to the battery of a solar powered gate system as long as the voltage of the battery is within Remootio's operating voltage range 5-32V DC | 12-24 VAC.
(note: Most batteries used in solar powered gates are 12V)
At 12 Volts, the average current consumption of Remootio 3 is ~30mA in normal mode and ~15mA in low power mode. (If needed, you can turn on low power mode in the Remootio app / settings / low power mode).
A typical gate battery has 7000mAh of charge. This means that a Remootio 3 unit can operate on a single battery for weeks, even if the battery is not recharged. In solar powered gate systems the battery is being recharged by the solar system during daytime which means that the system can run continuously throughout the year without the battery being drained.
Step 7 - Download the Remootio app
The Remootio App is available in all app stores. Ensure if you have already got the app installed that it is updated to the latest version before adding or updating a remootio device.
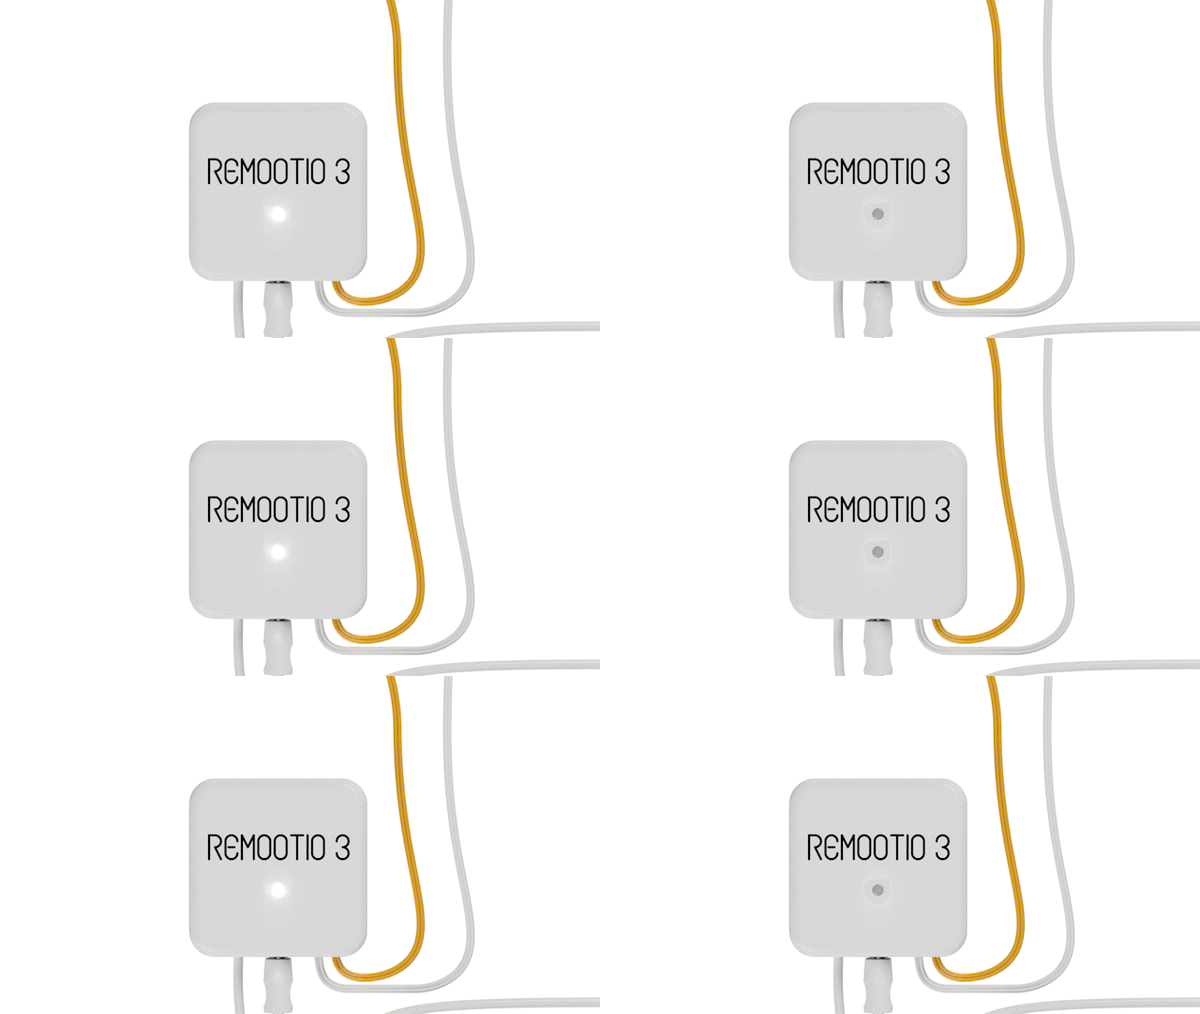
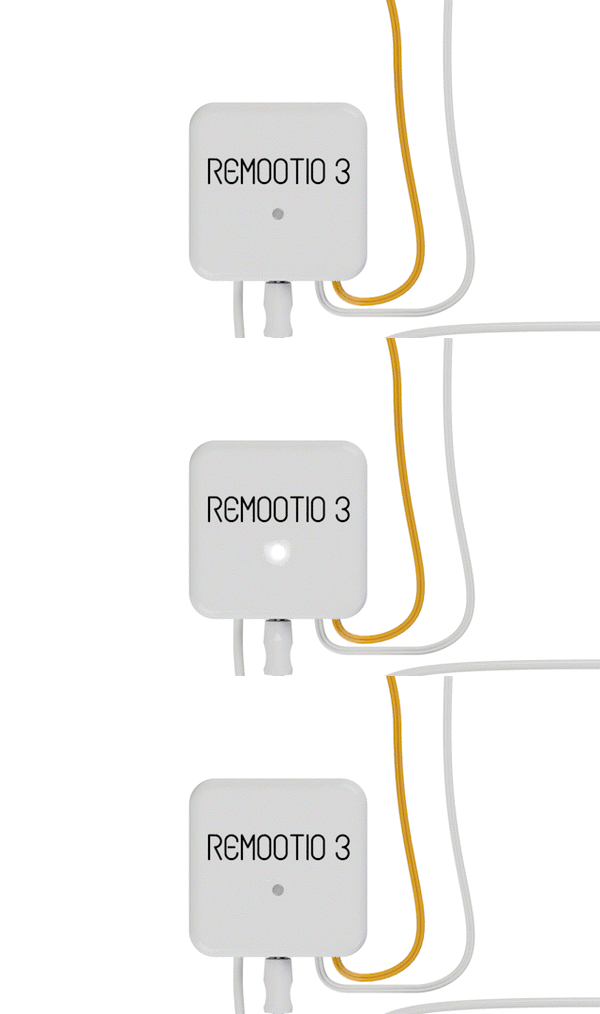
When Remootio is not set up yet, it will blink approximately twice per second:
After setting up Wi-Fi as well, the LED on Remootio will be illuminated continuously.
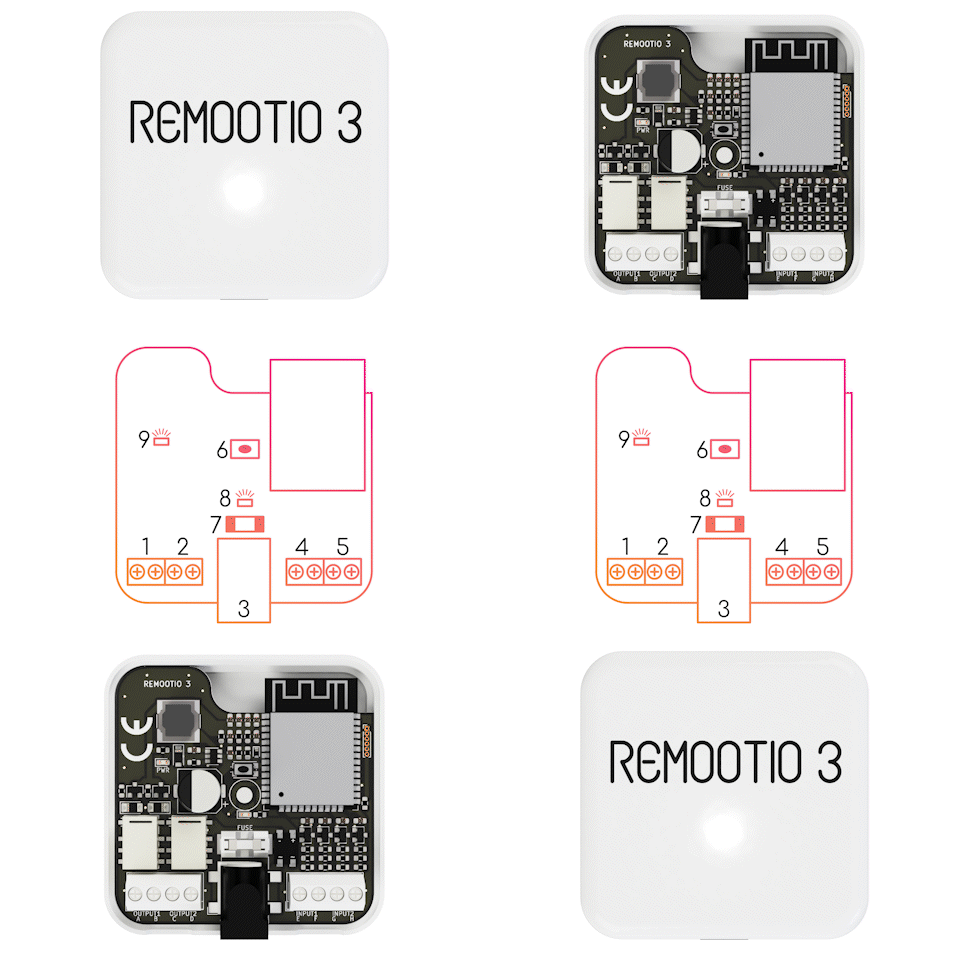
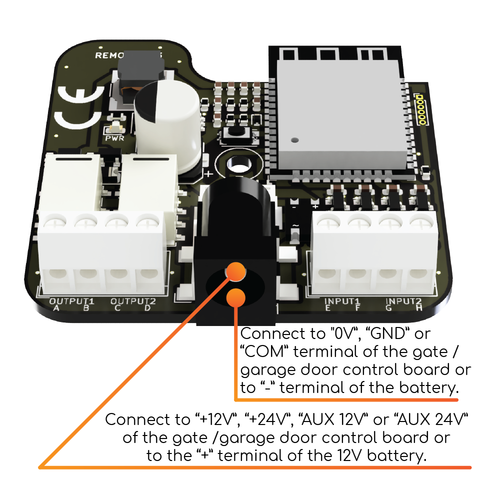
Remootio 3 pinout diagram:
control output 1 (normally open relay)
control output 2
(normally open relay)power input
5-32VDC | 12-24VAC
min. 100mAadd-on input 1
(e.g. sensor input)add-on input 2
(e.g. doorbell button input)reset button
fuse
feedback LED
power OK LED
For more details and images about about the sensor installation, please check our sensor installation tutorial. When enabling the sensor interface in the app, please make sure to select the corresponding input (in this example "input 1").
Step 5 - Assemble the Remootio unit back together
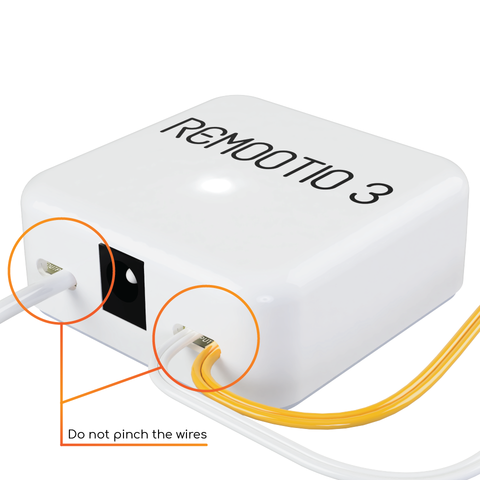
Use a screwdriver to assemble the Remootio unit. Make sure that you do not damage the wires during the assembly.
Apply the double sided tape on the back side of Remootio as shown below:
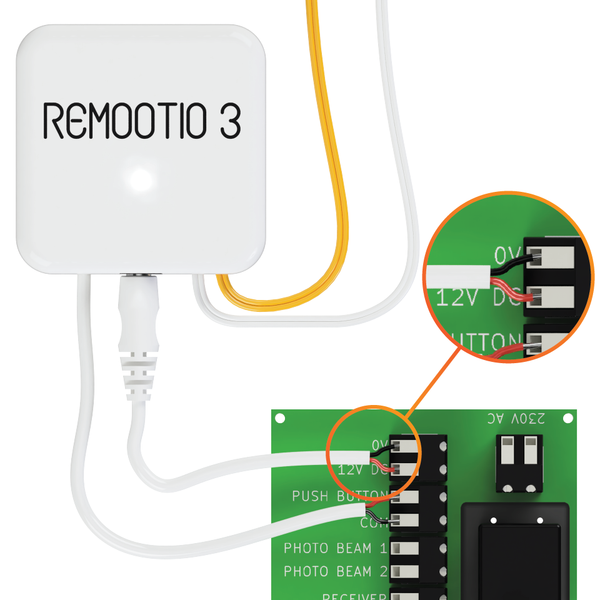
Tap the power from the gate control board
Remootio 3 has a wide operating voltage range, so you can use the dedicated terminals of your gate control board to power the Remootio 3 unit.
The operating voltage range of Remootio 3 is: 5-32V DC | 12-24 VAC
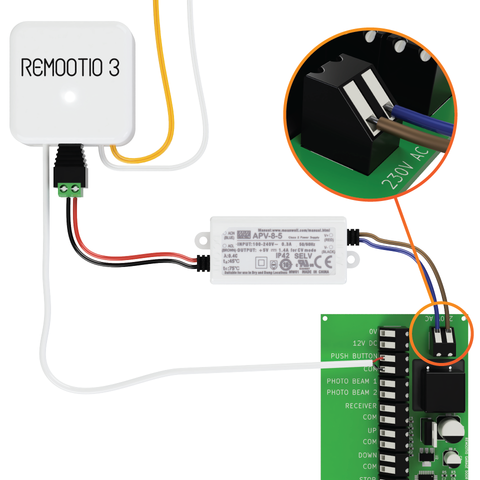
External 110V/230V to 5V power adapter
Alternatively, if you don't have a wall socket near your gate or garage door and there is also no way to tap power from the gate or garage door control board, the power adapter shown below can be used:
(When installing the power adapter, please leave all previously connected wires in place and only add the blue (Neutral) and brown (Line) wires of the power adapter to the corresponding terminals. The APV 8-5 power adapter can convert 110VAC or 230 VAC to 5 Volts. Please do not install the external power adapter of Remootio unless you are a professional or you are fully knowledgeable about what you are doing.
Step 8 - Set up the Remootio unit
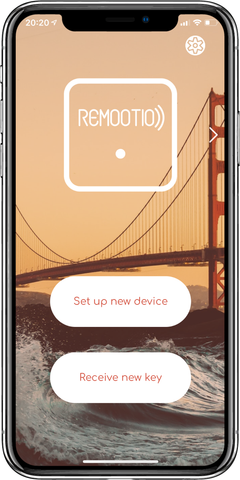
Launch the Remootio app and make sure your smartphone's Bluetooth is enabled. Tap on "Set up new device" and wait until the Remootio app finds the Remootio unit and sets it up.
After the Remootio unit is set up successfully, Remootio will blink once every 5 seconds.
Your new Remootio 3 is now ready to use. Please make sure to read the safety instructions below.
If you have any questions, please visit our FAQ page:
or let us know via e-mail at info@charged.services
Have you Checked our Store for additional Remootio Accessories?
We stock a range of Accessories for your Remootio 3 Installation and offer the best advice when it comes to securing your property while making the most out of your remootio.
Remootio Features and Installation
Our Youtube channel has all the information you need to know about how to install your Remootio 3 device.


